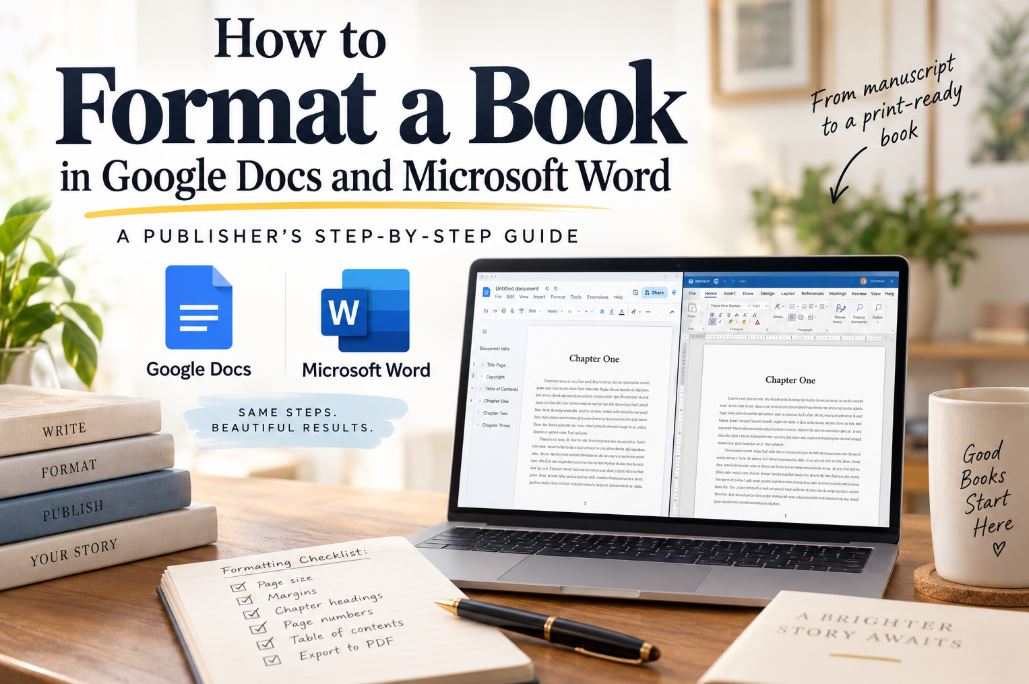
Formatting a book in Microsoft Word means converting a standard manuscript into a properly structured book interior: assigning Word styles to the title, chapters, and body text, setting the document to your book’s exact trim size, applying mirrored margins with a correct gutter, adding page numbers and real page breaks, generating an automatic Table of Contents, and exporting a print-ready PDF that you inspect separately before uploading anywhere. Get the order of those steps wrong and the file will fight you the whole way; get it right and the same file survives edits, survives a printer’s preflight check, and reads like it came from a publishing house.
Almost every manuscript that crosses a formatter’s desk starts life the same way: default margins, Times New Roman, a blank line between paragraphs, chapter titles typed in bold and pushed down the page with the Enter key. None of that is wrong for drafting. All of it has to change before the file can become a book, and it has to change in a specific sequence, because setting margins before your trim size is correct, or building a Table of Contents before your headings are styled, just means redoing the work later. This guide walks through that sequence with the exact menu paths, the industry numbers behind the settings, and the mistakes we see most often when a file gets rejected or comes back from the printer looking wrong. It covers the interior text file specifically; the cover, illustrations, and the book’s broader visual identity are their own discipline, which is what our book design services are built around.
The One Rule Everything Else Follows
Define a style once. Apply it everywhere. Never format the same kind of text twice by hand.
That’s the entire logic of this workflow, and it’s worth stating up front because it explains why the steps go in this particular order. Word’s Styles panel isn’t a formatting shortcut, it’s a set of rules you write once and the whole document obeys. Chapter titles, subheadings, and body text each get their own rule. Change the rule later and every instance updates at once. Skip this and you’ll spend the week before submission manually reformatting forty chapter headings because you decided the spacing looked wrong on chapter one.
Quick Reference: The Order That Works
Skimming first, formatting later? Here’s the full sequence in one place. Each item is covered in detail, with exact menu paths, further down.
- Run Word’s grammar and spelling Editor while the text still flows freely.
- Build the title page and lock in the Title style.
- Add the copyright page.
- Reserve a page for the Table of Contents.
- Format Chapter One and lock in Heading 1.
- Apply Heading 1 to every remaining chapter.
- Add Heading 2/3 if the book needs them.
- Format one body paragraph and lock in the Normal style.
- Set a consistent first-line indent and confirm widow/orphan control is on.
- Set the document to its real trim size, applied to the whole document.
- Set mirror margins, with the gutter value in the Inside field only.
- Add page numbers.
- Insert real page breaks (Ctrl + Enter) before every chapter.
- Clean up leftover spacing and formatting debris.
- Generate the automatic Table of Contents.
- Settle front-matter page-numbering behavior.
- Read the entire book, page by page.
- Update the Table of Contents one final time.
- Export to PDF.
- Open and inspect the PDF separately before uploading anywhere.
Before You Format: Run Word’s Grammar and Spelling Check
Do this while the manuscript is still one continuous flow of text, before you start locking in styles and page breaks. Fixing a typo after the book is fully paginated can shift a line onto the next page and knock a chapter opening out of place; fixing it now costs nothing.
Go to the Home tab and choose Editor, or just press F7. Either opens the Editor pane, which scans the whole document and sorts what it finds into categories: Spelling, Grammar, Clarity, Conciseness, and a few more depending on your version. Click a category to step through its issues one at a time, and either accept the suggestion, choose Ignore Once, or tell it to stop flagging that particular issue for the rest of the document. The Review tab has the same tool under Check Document, if that’s the ribbon you tend to live in.
Worth knowing before you rely on it too heavily: a Microsoft 365 subscription gets you the fuller Editor, with style and clarity suggestions on top of basic spelling and grammar. A one-time-purchase, non-subscription copy of Word checks spelling and grammar but not much beyond it. Either way, run it, fix what’s genuinely wrong, and then read the flagged items with some skepticism, especially in fiction. Editor doesn’t know your character talks in fragments on purpose, and it will flag perfectly intentional dialogue as a grammar error every time. Treat it as a fast first pass that catches real mistakes, not a substitute for a human proofreader going through the finished manuscript once formatting is done.
Step 1: Build the Title Page and Lock In the Title Style
Start on the first page. It typically holds the book title, a subtitle if there is one, and the author’s name, formatted manually exactly the way you want it to look, then it stays largely on its own.
Once you’re happy with the title’s font, size, weight, and spacing, select it and go to Home → Styles, right-click Title, and choose Update Title to Match Selection. That one action turns your specific choices into a reusable style. Format the author’s name separately; it doesn’t need to share the Title style.
Step 2: Add the Copyright Page
Directly after the title page, add the copyright page. This is not the place for creative formatting. Keep it plain: copyright notice, author name, year, a rights statement, ISBN once you have one, edition information, and any disclaimer the book needs. Readers skip this page. Printers and platforms sometimes check it. Simple, correct, and out of the way is the goal.
Step 3: Reserve a Page for the Table of Contents, But Don’t Build It Yet
If the book needs a Table of Contents, leave a blank page for it now. Don’t try to fill it in by hand. Word can only generate an accurate, automatically updating table once every chapter heading in the manuscript carries the correct heading style, which hasn’t happened yet at this point in the process. Typing chapter titles and page numbers manually here is wasted effort, because the moment you add or cut a paragraph later, every number will be wrong.
Step 4: Define Heading 1 as Your Chapter Style
Go to your actual first chapter. Format “Chapter One” (or whatever your convention is) exactly the way every chapter heading should look: font, size, weight, capitalization, alignment, and the space above and below it. Then select it, go to Home → Styles, right-click Heading 1, and choose Update Heading 1 to Match Selection.
From here forward, every subsequent chapter title gets selected and clicked into the Heading 1 style from the gallery. Don’t redesign each one by hand. Beyond keeping every chapter visually identical, this is the step that makes the Table of Contents possible later, because Word builds that table by scanning the document for Heading 1 (and, if you use them, Heading 2 and 3) text.
Step 5: Add Heading 2 and 3 for Internal Sections, If You Need Them
If chapters contain internal subsections, format one the way you want every subheading to look, then update Heading 2 to match, the same way you did for chapter titles. Add Heading 3 only if the book genuinely needs a third level; most don’t. The hierarchy by the end of this step should be:
- Title: the book title
- Heading 1: chapter titles
- Heading 2: major subheadings within a chapter
- Heading 3: smaller subsections, if the book needs them
- Normal: everything else
Get this order right before you touch body text. Body text formatting comes next, and it’s easy to accidentally carry heading formatting into a paragraph if the styles aren’t already locked in.
Step 6: Standardize the Body Text
Pick one completely ordinary paragraph and format it exactly the way the rest of the book’s body text should look: font, size, alignment, line spacing, paragraph spacing, and first-line indent. Then update the Normal style to match, the same way as before.
A few opinions worth having here, because this is the step that determines whether a self-published book reads as professional or as a printed manuscript:
- Use a serif font for the body text. Garamond, Palatino, and Georgia are all reliable, readable choices for print. Times New Roman technically works, but it’s the single fastest way to make a finished book look like an office document, because that’s exactly what most readers associate it with.
- 11 point is the safest default for a 6″ x 9″ trim, with 10 to 12 point as the reasonable range depending on the specific typeface’s x-height and how dense the font looks on the page. This is also the size Amazon’s own formatting guidance points to for that trim size.
- Justify the body text, not left-align it. Justified text with a first-line indent is what readers expect from a printed book; ragged-right, block-paragraph text reads as a manuscript or a report.
- No blank lines between paragraphs. Use the first-line indent (next step) to separate paragraphs instead. Blank lines between every paragraph is one of the more reliable tells of an unformatted manuscript.
Step 7: Set the First-Line Indent Properly
Don’t build your indent out of spaces or tab presses. Both create inconsistent gaps that shift the moment the font or trim size changes. Use the paragraph settings, or drag the top triangle on Word’s ruler, which controls first-line indent specifically. A range of 0.2″ to 0.3″ is a common starting point; the right number depends on your trim size, font, and font size, but whatever you land on, apply it uniformly. Many books intentionally drop the first-line indent on the paragraph immediately following a chapter heading; that’s a stylistic choice, not a requirement, but it’s worth deciding on purpose rather than by accident.
While you’re in the paragraph settings, this is also a good moment to confirm widow and orphan control is switched on (Paragraph → Line and Page Breaks tab). It’s on by default in most Word installations, but it’s worth checking, because it’s what stops a single line of a paragraph from being stranded alone at the top or bottom of a page, an easy thing to miss on a manual read-through and an obvious tell to anyone who’s formatted a few hundred books.
Step 8: Set the Actual Trim Size of the Book
This is where the document stops being a standard 8.5″ x 11″ file and starts being the physical size of your finished book. Go to Layout → Size → More Paper Sizes and enter the width and height of your trim size. Under Apply to, make sure Whole document is selected, not just the current section, or you’ll end up with part of the book at the wrong dimensions and not notice until much later.
Here’s how the three most common sizes actually compare:
| Trim Size | Feel | Typically Used For | Effect on Page Count |
|---|---|---|---|
| 5″ x 8″ | Compact, closer to a mass-market paperback | Fiction, shorter genre novels | More pages than larger trims for the same word count |
| 5.5″ x 8.5″ | A comfortable middle ground | Literary fiction, narrative nonfiction | Fewer pages than 5″ x 8″, more than 6″ x 9″ |
| 6″ x 9″ | The standard trade paperback feel | Business books, memoirs, general nonfiction | Fewest pages of the three for the same word count |
Larger and specialty trim sizes exist for illustrated and oversized books, but for a typical text-driven manuscript, one of the three above is almost always the right call. Choose based on genre expectations and the finished page count, not personal preference alone; a short, punchy novel at 6″ x 9″ can look thin, while a long nonfiction manuscript at 5″ x 8″ can turn into an unwieldy brick.
Step 9: Set Mirror Margins, and Get the Gutter Field Right
This is where the most expensive-looking formatting mistakes tend to happen, so it’s worth slowing down here.
Go to Layout → Margins → Custom Margins. In the Multiple pages dropdown, choose Mirror margins. Word will relabel the left and right margin fields as Inside and Outside, since a bound book’s margins swap sides depending on whether you’re looking at a left-hand or right-hand page.
The inside margin, the gutter, needs to be the largest of the four, because it’s the margin that disappears into the binding. How large depends on your final page count and where you plan to print. Amazon KDP scales the gutter with page count; IngramSpark uses a flat minimum instead:
| Page Count | KDP Inside (Gutter) | IngramSpark Inside (Gutter) | Outside / Top / Bottom |
|---|---|---|---|
| 24–150 pages | 0.375″ | 0.5″ | KDP: 0.25″ min (0.375″ with bleed) |
| 151–300 pages | 0.5″ | 0.5″ | IngramSpark: 0.5″ recommended on all four sides |
| 301–500 pages | 0.625″ | 0.5″ | Same as above |
| 501–700 pages | 0.75″ | 0.5″ | Same as above |
| 701–828 pages | 0.875″ | 0.5″ | Same as above |
IngramSpark also recommends an extra 0.125″ clear strip on the bind side for perfect-bound and hardcover books, on top of that 0.5″, so its real spine-side allowance runs closer to 0.625″. If you plan to publish on both platforms, size your margins to satisfy whichever one asks for more on a given edge, and don’t just take the table at face value once your book crosses roughly 400 pages: printing tolerance means a little extra gutter beyond the stated minimum is cheap insurance on a thick book. Confirm your final page count before locking anything in, too. A manuscript that grows from 295 pages to 305 during a late edit crosses a threshold on KDP’s own scale, and a gutter that was correct before that edit no longer is.
One detail catches even careful authors: Word’s Custom Margins dialog has both an Inside field and a separate Gutter field, and they are not the same setting. The Inside field is your actual inside margin. The Gutter field adds additional space on top of whatever margin you’ve already set. Put 0.75″ in both, thinking you’re confirming the same number twice, and you’ve actually asked for 1.5″ of binding-side space, which will visibly shove your text block off-center. Set your gutter value in the Inside field and leave Word’s Gutter field at zero. This is one of the few places where a document can look completely fine on screen, clear a platform’s technical check, and still arrive from the printer looking wrong, because a too-generous gutter doesn’t trigger a rejection the way a too-small one does. You typically only catch it by holding the physical proof.
Step 10: Add Page Numbers
Double-click into the footer to open Word’s Header & Footer tools, then go to Insert → Page Number → Bottom of Page and pick a plain, understated numbering style. Check the footer for stray blank lines or an oversized gap before moving on. Front matter often needs different numbering behavior than the rest of the book; that’s a section-break problem, and it’s easier to solve later once the rest of the document is stable.
Step 11: Force Every Chapter Onto Its Own Page, Properly
Every chapter should open on a fresh page, but the way you get there matters. Don’t hold down Enter until the heading drops to the next page; that adds a stack of empty paragraph marks that shift the moment anything earlier in the manuscript changes length, which is most of the time during editing. Instead, place your cursor immediately before the next chapter heading and press Ctrl + Enter to insert an actual page break. A real page break stays exactly where you put it no matter what happens earlier in the document.
If you want the more traditional look of chapters always starting on a right-hand page, the way most trade-published books are laid out, you can extend this with a blank left-hand page wherever a chapter would otherwise land on the left. It’s a nice touch, not a requirement, and it’s worth deciding on deliberately rather than leaving to chance.
Step 12: Clean Up the Manuscript’s Accumulated Mess
Before generating anything automatically, go through the file and remove the small formatting debris that builds up over months of drafting: repeated blank paragraphs, double spaces, chapter headings that were pushed into place with the Enter key instead of a real page break, inconsistent indents, stray font changes, and headings that somehow ended up with the wrong style applied. This is tedious. It’s also the step most responsible for whether the finished book feels clean or feels like exactly what it is, a manuscript that’s been formatted after the fact.
Step 13: Generate the Table of Contents
With every chapter now correctly tagged as Heading 1, go back to the page you reserved earlier, place your cursor there, and select References → Table of Contents, then choose an automatic style. Word pulls the chapter titles and page numbers directly from your heading styles. If Heading 2 or 3 entries show up and you don’t want them listed, adjust the Table of Contents settings to limit which heading levels display. Never type page numbers into this table by hand; the entire point of building the heading styles correctly earlier was to avoid exactly that.
Step 14: Settle the Front Matter
Go back and look at everything before Chapter One: half-title, title page, copyright page, dedication, acknowledgments, foreword, preface, table of contents, introduction, whichever of these your book actually has. Decide which of these pages should carry a visible page number. Convention in professionally formatted books is to suppress numbers on most front-matter pages and start normal numbering with the main text, sometimes using small roman numerals for front matter that does need numbering. Getting this right usually means introducing section breaks and unlinking the header/footer between sections so the numbering can restart cleanly. It’s fiddly, but it only needs doing once.
Step 15: Read the Whole Book, Page by Page
Don’t export yet. Scroll through the entire document and actually look at it: title page, copyright page, table of contents, every chapter opening, font consistency, indents, margins, page numbers, spacing, blank pages, images, headers and footers, and the closing pages. Pay particular attention to the seams, the page right before and right after each chapter break, since that’s where leftover formatting problems tend to hide. The mistakes that survive to this point are almost always small: an extra paragraph mark, one heading that didn’t get the right style, a font that changed for no visible reason, an accidental blank page.
Step 16: Update the Table of Contents One Last Time
Any changes made during the full read-through can shift chapters onto different pages, so the Table of Contents needs a final refresh after everything else is locked, not before. Click into it, choose Update Table, and pick Update page numbers only if nothing but pagination shifted, or Update entire table if any heading text changed. Do this immediately before export, not earlier.
Step 17: Export to PDF and Check the PDF Separately
Once the Word file is truly finished, export it with File → Save As / Export → PDF. This becomes your fixed-layout print interior. Do not assume it’s correct because the Word document looked correct on screen; PDF export occasionally introduces its own quirks, particularly with fonts and images. Open the exported PDF on its own and check trim size, margins, page numbers, chapter placement, font rendering, image quality, missing text, stray blank pages, and the table of contents links. Only once that separate check comes back clean is the file genuinely ready to prepare for upload, subject to whatever additional technical requirements your specific printing platform has.
Common Mistakes Worth Naming Directly
A few problems show up often enough that they deserve to be called out on their own, outside the step-by-step flow:
Filling in both the Inside and Gutter fields. Covered above, and worth repeating, because it’s the formatting mistake least likely to be caught before a physical proof arrives.
Leaving the page size at 8.5″ x 11″ while setting margins for a 6″ x 9″ trim. The margin numbers can look perfectly correct and still be calculated against the wrong page entirely. Set your trim size before you touch your margins, not after.
Building indents and spacing with the space bar or repeated Enter presses. Both survive exactly as long as nothing else in the document changes, which for most manuscripts is not very long.
Treating a 6″ x 9″ trim as the default for every book. It’s the most common size for a reason, but a short novel or a long, dense nonfiction title often reads better in a different trim. Decide based on genre and finished length, not habit.
Skipping the separate PDF review. A Word document that looks right on screen is not the same file a printer will receive. Always check the exported PDF on its own.
Frequently Asked Questions
What margins does KDP require for a print book?
Amazon KDP scales the inside gutter margin with page count: 0.375″ up to 150 pages, 0.5″ from 151 to 300 pages, 0.625″ from 301 to 500, 0.75″ from 501 to 700, and 0.875″ beyond that. Outside, top, and bottom margins need at least 0.25″, rising to 0.375″ if anything on the page bleeds to the edge. IngramSpark uses a simpler flat 0.5″ recommendation on all four sides regardless of page count.
How do I set up mirror margins in Word for a book?
Go to Layout → Margins → Custom Margins, and in the Multiple pages dropdown choose Mirror margins. Word relabels the left and right fields as Inside and Outside. Put your gutter value in the Inside field, leave Word’s separate Gutter field at zero, set Outside, Top, and Bottom to at least your platform’s minimums, and apply the change to the whole document, not just one section.
Can I format a book in Google Docs instead of Word?
The underlying logic, styles instead of manual formatting, correct trim size, real page breaks, is the same regardless of software. Word gives more direct control over mirror margins and the print-specific settings covered here, which is why it remains a common choice for print interiors, but the same principles apply if you’re working in Google Docs, Pages, or a dedicated layout tool.
Do I need different formatting for print books and ebooks?
Yes, meaningfully. Print formatting is built around a fixed page: exact trim size, mirror margins, a real gutter, and a table of contents tied to physical page numbers. Ebooks are reflowable, meaning the reader’s device controls the page size and font, so mirror margins and fixed pagination don’t apply. Most authors need to produce both files, and they’re built differently even when they start from the same manuscript.
How long does it take to format a book in Word?
For a manuscript with a simple structure, chapters, no images, standard front matter, a careful pass through every step here typically takes a few hours to a day or two. Illustrated books, complex front matter, or a manuscript with heavy leftover formatting debris from drafting takes longer. Budget more time than feels necessary for the final page-by-page read-through; it’s the step most often rushed and most likely to catch something.
Should I hire a professional book formatter instead of doing it myself?
If the book is straightforward and you’re comfortable working through styles and page setup carefully, doing it yourself is entirely realistic, that’s what this guide is for. If the manuscript has a lot of images, a complex front-matter structure, or you’d simply rather spend the time writing the next book, our book formatting services handle exactly this, start to finish, as a reasonable trade of money for time.
The Bottom Line
None of the individual steps here are difficult on their own. What makes book formatting go wrong is usually sequence: setting margins before the trim size is correct, building the Table of Contents before the headings are styled, formatting forty chapter titles by hand instead of defining one style and applying it. Do the steps in this order, define your styles once instead of repeatedly, and check the exported PDF as its own separate step, and the file you end up with will read like a book, not like a manuscript that got exported.
About the Author
Fiction & Speculative Narrative Editor, Writers of the West
Natalia Coldwater holds a B.A. in Creative Writing from Brooklyn College and specializes in speculative fiction, psychological storytelling, and personal development editing. Based in Brooklyn, NY, she has been with Writers of the West for over two years, working across memoir, self-help, and fiction manuscripts. Her editorial focus centers on emotional clarity, character voice, and transforming complex experiences into structured, reader-ready narratives.
writersofthewest.net · Professional Ghostwriting Services, Book Editing & Publishing Guidance