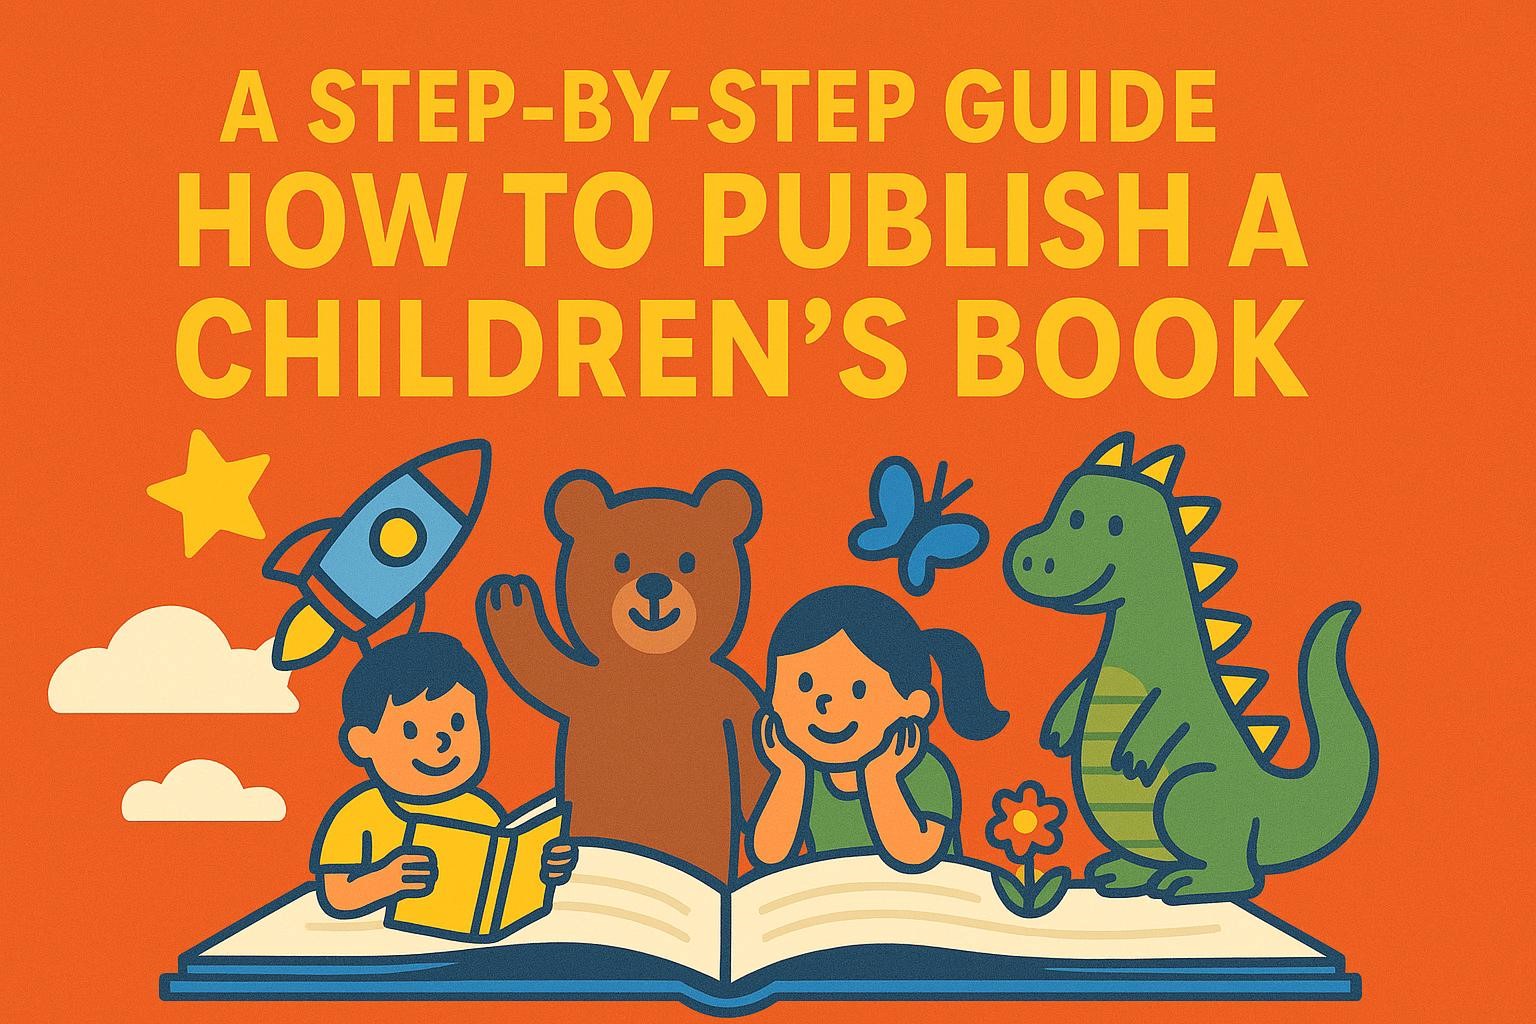
Dreaming of publishing a children’s book? This honest, step-by-step guide breaks down everything from writing and illustrations to publishing options, printing, and promotion; perfect for first-time authors who want clarity without the fluff.
Introduction
You’ve always had a soft spot for stories that sparkle. Maybe it was the picture books you read on loop as a kid, or the ones you now read aloud to someone small and wiggly. Either way, something’s tugging at you now; a whisper of a story, a character, a world. And you’re wondering… what if I actually made this into a book?
But when you search how to publish children’s book, the magic dims under the weight of confusing options, rules, and industry lingo.
Let’s fix that.
This guide is your no-nonsense map to bringing your story to life. From first draft to illustrated pages, printed books, and even your first launch. Whether you’re a dreamer, a teacher, a parent, or just someone with a tale to tell, this is where your journey begins.
And trust me, there’s still magic in it.
Define Your Audience & Concept
Publishing a children’s book starts long before you write “Once upon a time.” The very first step? Understanding who you’re writing for and what kind of story you want to tell.
This part might seem simple, but get it wrong and the rest of the process becomes a lot harder. Nail it, and everything clicks into place.
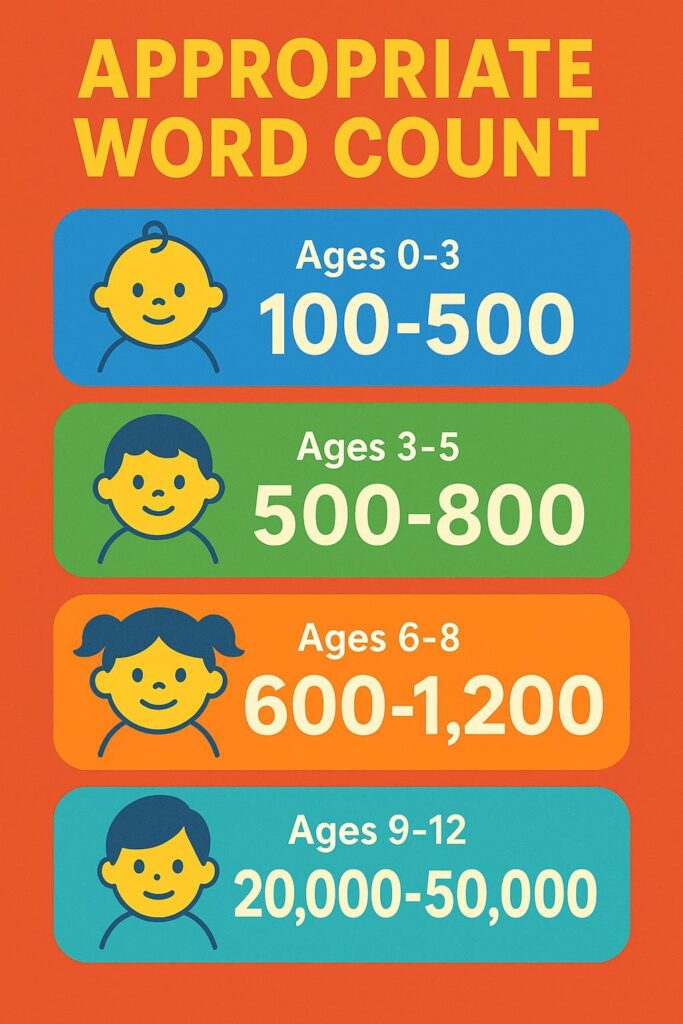
Choose Your Age Group (Seriously, This Matters)
Children’s books aren’t one size fits all. A toddler’s board book is wildly different from a chapter book for an eight-year-old. You need to know where your story fits because that decision influences your word count, structure, language, illustrations, and even your publishing options.
Here’s a quick guide:
- Ages 0 to 3 (Board Books): Simple concepts, minimal text, bold visuals. Often fewer than 200 words.
- Ages 3 to 5 (Picture Books): Rhyming or rhythmic text, usually under 500 words. Lots of repetition and predictability.
- Ages 4 to 6 (Early Picture Books): Up to 1,000 words, simple narratives with emotional resonance.
- Ages 5 to 9 (Early Readers): Around 2,000 to 2,500 words. Chapters begin to appear and plots grow slightly more complex.
- Ages 7 to 9 (Chapter Books): 10,000 to 12,000 words. More text, fewer pictures, longer scenes.
- Ages 8 to 12 (Middle Grade): 20,000 to 30,000 words. Fully developed characters and plot with little to no illustration.
Don’t guess. Read books in your category. Study the tone, pacing, word count, and layout. Get familiar with what kids in that age range are actually reading and loving.
What Does Your Story Feel Like?
Children don’t just read for plot. They read for wonder, for warmth, for laughter, for safety. So ask yourself: what emotion do you want your reader to walk away with?
Do you want your story to soothe a child to sleep? Make them laugh until juice comes out of their nose? Help them feel brave? Seen? Less alone?
Start there. Emotion is your anchor.
Map Out Your Story’s Arc
Yes, even a 300-word picture book needs a beginning, middle, and end.
- Beginning: Introduce the main character and their world.
- Middle: Present a problem or conflict that challenges them.
- End: Resolve it in a satisfying, often uplifting way.
This three-act structure keeps things simple but powerful. Even the silliest picture book has structure behind it. It’s what helps young readers feel safe in the story.
Ask: What Makes This Book Yours?
There are millions of kids’ books out there. So what makes yours different?
Maybe it’s your voice. Maybe it’s a theme you’ve never seen done well. Maybe it’s a personal story, a cultural lens, or just a ridiculously funny character with a unibrow.
Don’t try to write what you think publishers want. Write what only you could write.
This is the soul of children’s book publishing. Stories that come from a place of truth, wonder, and care.
Research & Plan
So, you’ve got your idea. You know the age group. You’ve started to feel the story taking shape in your mind.
Now it’s time to move from daydream to direction.
Writing a book, even a short one for children, isn’t just about waiting for inspiration to strike. It’s about laying the groundwork so you don’t get stuck halfway through or burn out before you begin. This is the planning phase, and it matters more than most people realize.
Get to Know the Market
Before you write a single sentence, spend time inside the world you’re writing for.
Head to a bookshop or your local library. Browse the children’s section, especially in your target age group. Pull books off the shelves. Notice the trends. What topics are popular right now? What styles of illustration catch your eye? What tones are being used; gentle, quirky, dramatic?
Read what kids are reading. Not just one or two, but twenty or thirty books. Take notes.
This isn’t about copying anyone else. It’s about understanding the expectations of the genre so you can create something original within it.
Set Your Intention
Ask yourself why you’re writing this book.
Is it a story you’ve always wanted to tell? Is it inspired by your own childhood or your own children? Are you hoping to teach something; kindness, confidence, curiosity?
Your motivation matters. It will keep you going when the process gets tough. And it will help you shape a book that feels focused and meaningful, not random or rushed.
Write your “why” on a sticky note and put it somewhere visible. You’ll need it.
Outline the Story
Don’t worry, this isn’t school. You don’t need a formal outline with Roman numerals and bullet points. But you do need to know roughly where your story is headed.
Start simple. Jot down the key beats of the story:
- Who is your main character?
- What do they want?
- What gets in the way?
- How do they try to solve the problem?
- How does it end?
This will help you avoid the dreaded “soggy middle,” where things start to wander and lose momentum.
Even if you’re more of a “write as you go” kind of person, a loose map can be a lifesaver. You can always change it as the story evolves.
Make a Writing Plan
This is where your good intentions become action.
Be realistic. You don’t need to write the whole book in a weekend. But you do need some structure.
Set a schedule that works for your life. Maybe it’s 30 minutes every morning before work. Maybe it’s two hours on Saturdays. Put it in your calendar.
Break the process into small, doable goals:
- Week 1: Finish outline
- Week 2: Write beginning
- Week 3: Write middle
- Week 4: Write ending
- Week 5: First edit pass
Small steps get big things done. And this is especially true in children’s book writing, where every word counts and every page is a precious piece of the story.
Planning may not feel as fun as storytelling, but it’s what gives your story a chance to shine.
Write and Refine Your Manuscript
Here’s the part you’ve probably been waiting for: actually writing the thing.
This is where you take all your planning, ideas, sticky notes, and story sparks, and turn them into a first draft. It might be messy. It might not look anything like the books on your shelf (yet). But that’s okay. You’re not aiming for perfect. You’re aiming for done.
Embrace the Messy First Draft
No matter how clear your vision is, the first version of your story will be imperfect. That’s not a sign of failure. It’s a sign you’ve started.
Write without overthinking. Don’t pause every sentence to fix a word or worry if it sounds “publishable.” Just get the story out of your head and onto the page.
It doesn’t matter if it’s clunky. You’ll polish it later.
Set a timer if it helps. Give yourself 25 minutes, no distractions, and just write. Kids’ books may be short, but the thinking behind them runs deep. Give yourself permission to take your time.
Read it Aloud. Then Again.
Once you’ve got a full draft, read it aloud. Multiple times.
Children’s books are written to be read out loud. The rhythm, pacing, and language all have to feel natural in someone’s mouth. You’ll catch awkward phrasing, repetitive words, or stumbles that you didn’t notice on the screen.
If it sounds clunky or flat, fix it. If it makes you smile, keep going.
Trim, Shape, Strengthen
Now the refining begins.
This is where you cut the fluff. Tighten the dialogue. Sharpen the emotional arc. Swap passive for active language. Ask yourself:
- Does every sentence move the story forward?
- Is the language age-appropriate?
- Are the emotional beats clear and earned?
Children’s books are short, but that makes them harder, not easier. Every word is doing heavy lifting. So make every word count.
Get Feedback from the Right People
Here’s the secret sauce: let someone else read it. Not just anyone. The right readers.
If your target age is 4 to 6, read it to a child in that group (if you can). Watch their face. Do they giggle? Drift off? Ask questions? Kids are honest critics, and their reactions will tell you more than adult praise ever could.
Also, share your draft with adults who understand storytelling. Writers’ groups. Teachers. Librarians. Fellow parents. Don’t hand it to someone just to get compliments. Hand it to someone who will help you make it better.
Take their notes with an open mind. But remember, it’s your story.
Don’t Rush This Part
You might be tempted to finish your draft and jump straight into figuring out how to publish children’s book projects. But skipping the editing phase is like frosting a cake before it’s baked. It won’t hold.
Give your manuscript time. Step away from it. Come back with fresh eyes. Do another pass.
Your future readers, those little hands and curious minds, deserve your best work.
Illustrations & Design
Your words are only half the magic. In children’s books, visuals carry just as much storytelling weight, sometimes more. The look and feel of your book will shape how young readers experience your story, and how often they reach for it on the shelf.
Illustration and design are not afterthoughts. They’re storytelling tools.
Should You Illustrate It Yourself?
Let’s start with the big question: are you planning to do the illustrations yourself?
If you’re a trained illustrator with a strong grasp of visual storytelling, colour, layout, and character expression, go for it. Picture books often start with an author-illustrator combo in one person, and it can lead to beautiful, cohesive results.
But if you’re not confident in your art skills, it’s better to partner with a professional. Children’s books need illustrations that enhance the story, not distract from it.
This doesn’t mean you need to hire a celebrity illustrator. You can find talented artists through:
- Online platforms like Behance, Fiverr, or Upwork
- Illustration agencies
- University art programs
- Author-illustrator communities like SCBWI
Look for someone whose style matches the tone of your story. Make a vision board with images, colours, and moods to communicate your ideas. And always, always have a written contract.
Plan Your Layout Early
Most picture books are 32 pages long. Not 30. Not 35. The 32-page layout is a printing industry standard.
That doesn’t mean you have 32 full pages of story. Some pages will be for endpapers, title pages, or copyright info. Plan your pacing with that in mind.
Start mapping it out visually. This is where a storyboard helps. You don’t need to be a designer, just sketch rough boxes for each spread and note what’s happening where.
- Where will the page turns land?
- Which moments deserve a full spread?
- Which lines need space to breathe?
This visual planning stage is also a great time to check for any layout issues that might have slipped past during children’s book editing, like overly long sections of text or unclear action sequences.
Design Matters More Than You Think
Fonts, colours, spacing, these details matter. Children’s books need to be readable, inviting, and age-appropriate. That means:
- Large, easy-to-read fonts
- Plenty of white space
- Clear alignment between text and images
- Consistency in style and tone
The cover, especially, needs to shine. It’s what sells your book in a split second, whether online or in a bookshop.
You might want to hire a designer to finalize the typography and layout, even if you’re handling some design work yourself. Don’t skip this step just to save money. A poorly designed book won’t connect, no matter how great the story is.
Illustrations and design bring your book to life in a way text alone never can. When done right, they make the story unforgettable.
Now, with your manuscript polished and your visuals mapped out, you’re ready to decide how you’re going to publish it. Let’s explore the paths ahead.
Choose Your Publishing Path
You’ve written and polished your manuscript. You’ve planned the visuals, maybe even hired an illustrator. Now comes the big decision: how will your book make its way into the world?
There’s no one-size-fits-all answer here. The right publishing path depends on your goals, budget, timeline, and how much creative control you want to keep.
Let’s break it down.
Traditional Publishing
This is the “classic” route. You write the manuscript, then submit it to a literary agent or directly to publishers who accept unsolicited submissions.
If accepted, the publisher handles the rest: editing, illustration, design, printing, distribution, and marketing. You’ll likely get an advance (a one-time payment) and royalties on book sales. You won’t pay anything upfront.
Pros:
- Industry validation and credibility
- Professional support for every step
- Broad distribution, including libraries and major bookshops
Cons:
- Very competitive, especially for first-time authors
- Rejection is common and often vague
- You give up creative control, especially with illustrations
- The process is slow and can take one to two years or more
If you go this route, you’ll need a well-polished manuscript, a standout query letter, and a lot of patience. And don’t be discouraged by rejections. They’re part of the game.
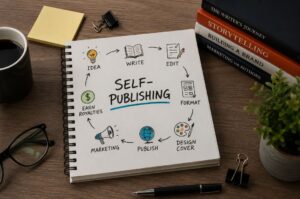
Self-Publishing
This is the fast-track option and the one that gives you full control.
You become the publisher, meaning you’re responsible for everything: writing, editing, illustrations, design, formatting, printing, distribution, and marketing.
Pros:
- Total creative control
- You keep a larger share of the profits
- Publish on your own timeline
- Great for niche or personal projects
Cons:
- No gatekeepers means quality varies
- Everything costs money upfront
- You must manage your own marketing and distribution
- It’s easy to get overwhelmed
Print-on-demand services like Amazon KDP, IngramSpark, and Lulu make this easier than ever. With the right prep or help from a firm providing self publishing services, your book can look just as polished as a traditionally published title.
Hybrid or Vanity Publishing
Hybrid publishers offer a mix. You pay them to produce your book, and they manage many of the publishing tasks.
But be cautious. Some hybrid presses are legit. Others are vanity publishers in disguise, charging high fees for mediocre results. Always do your homework, read contracts carefully, and talk to other authors before signing anything.
Pros:
- Get support without needing to land a traditional deal
- Often faster than traditional publishing
- Some offer editing, design, and distribution
Cons:
- You pay upfront, sometimes a lot
- You may lose rights to your work
- Not all companies deliver quality
No matter which path you choose, children’s book publishing is a journey. Each option has trade-offs, and there’s no “wrong” way, just the way that works best for you.
Next, we’ll get into the practical steps of preparing your files or submissions so your book is ready for the world.
Prepare Submission or Book Files
By this point, your story is written, revised, and visually mapped out. Now it’s time to get your files ready, whether you’re submitting to a publisher or preparing to upload your book yourself.
This step is all about presentation. It’s where your book shifts from creative project to professional product.
The Traditional Route
Submitting to agents or publishers? You’ll need to prepare a small package of materials that showcases your story in the best possible light. Here’s what most expect:
1. Query Letter
This is your introduction. Think of it like a cover letter for your book. It should be short, clear, and compelling.
Include:
- A quick hook that captures the heart of your story
- Title, word count, and target age range
- A sentence or two about you
- Why you’re querying that agent or publisher specifically
Every word matters here. Read successful examples online. Avoid gimmicks. Be professional but human.
2. Manuscript
If you’ve written a picture book, you’ll usually send the full text pasted into the email. For chapter books or middle-grade, you might be asked for the first few chapters or a specific number of pages.
Format it properly:
- 12 pt font, double-spaced
- Clear chapter breaks or page breaks for picture books
- Include your name and title in the header
3. Synopsis (Sometimes)
Not always required, but some agents or editors may ask for a brief summary of the full story. Keep it to one page. Reveal the ending. They’re not looking for suspense, they’re looking for structure.
The Self-Publishing Route
Self-publishing? You’ll be prepping files for print or digital formats. It’s more technical but completely doable.
Here’s what you’ll need:
1. Formatted Interior File
This is the inside of your book; text and illustrations combined. You’ll need to decide:
- Trim size (standard sizes include 8 x 10 or 8.5 x 8.5 inches)
- Layout with correct margins and bleed
- Resolution of illustrations (at least 300 DPI)
Many authors use design tools like Adobe InDesign or Canva Pro. You can also hire a formatter if the tech side feels overwhelming.
2. Cover File
The cover needs to be a separate file, usually in PDF format. It includes:
- Front cover
- Spine (if your book is thick enough)
- Back cover
Print-on-demand platforms will give you templates based on page count and trim size. Make sure everything lines up perfectly.
3. ISBN and Copyright Page
You can get a free ISBN from Amazon KDP, or buy your own for more control. Include your copyright info and publishing imprint (if you have one) on the inside. Learning how to publish children’s book projects takes some upfront effort, but this step turns your creative dream into a product that can be printed, distributed, and held in someone’s hands.
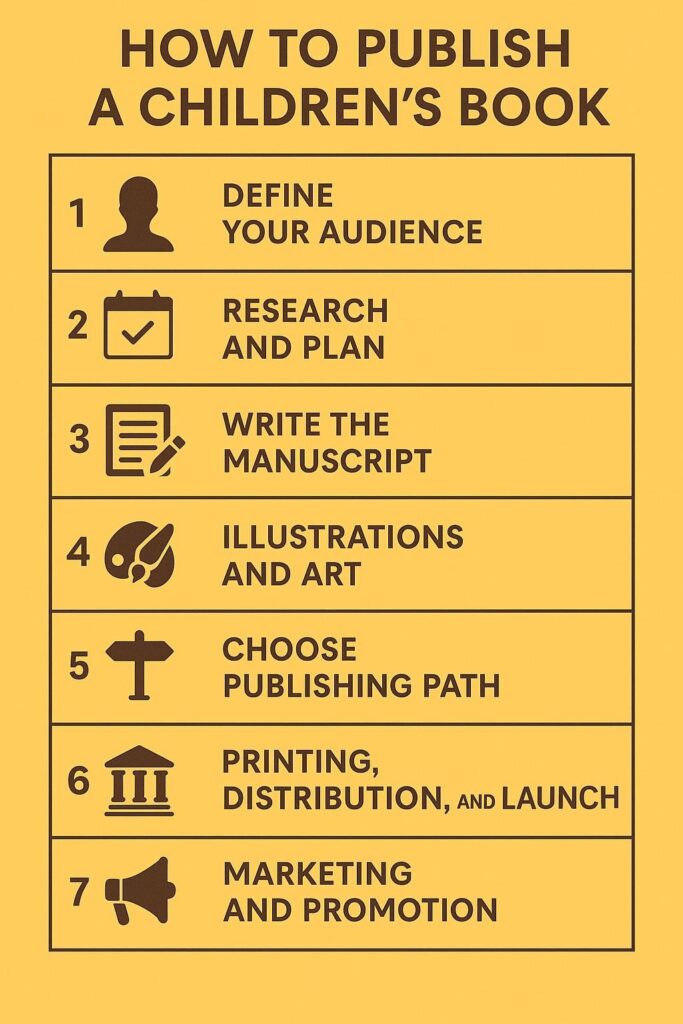
Printing, Distribution & Launch
Your files are ready. The story is written. The illustrations are vibrant. Now comes the moment you’ve been working toward: turning your book into something real.
This stage is about more than just hitting “publish” or sending a file to the printer. It’s about setting your book up for success in the real world, from the quality of the final copy to where it ends up and how readers discover it.
Order a Proof Copy First
Before you click “approve” and release your book to the world, always order a proof copy.
This is your chance to spot issues that didn’t show up on your screen:
- Are the colours too dark or too light?
- Is the text placed correctly?
- Are the margins clean?
- Is the spine centred?
Print issues happen all the time, even with careful prep. Holding a physical copy in your hands helps you catch little problems before they become big ones.
Choose Your Distribution Channels
Once your book is finalized, it’s time to decide how people will get their hands on it. You don’t have to go wide right away. Choose what works for your goals.
Amazon KDP
Easy to use, free to upload, and ideal for self-publishers. You can sell paperback, hardcover, and Kindle editions, and your book is available worldwide.
IngramSpark
Great for getting your book into libraries and independent bookstores. They offer hardcover and higher-end printing options, but you’ll need to provide your own ISBN.
Direct Sales
Want to sell your book through your website, at events, or to schools? Order in bulk and sell directly. You keep more of the profit and connect with your readers more personally.
Bookstores and Libraries
If you’re self-publishing, it’s harder, but not impossible, to get your book into shops. You’ll need to make it available through distributors they already use, like Ingram. Libraries often require specific metadata and may ask for reviews.
Plan Your Launch
This is where you move from author to book marketer. Don’t panic, it can be fun.
Start by building anticipation. Tease your cover on social media. Share behind-the-scenes moments from your children’s book writing journey. Offer sneak peeks of illustrations. Let people feel part of the process.
When launch day comes, treat it like a celebration:
- Host a virtual or in-person event
- Offer preorders or giveaways
- Reach out to local schools and libraries
- Pitch to parenting blogs or kidlit influencers
Your first launch doesn’t have to be huge. Focus on connecting with readers, getting your book into hands, and enjoying the moment.
Printing and distribution are the final steps in making your book real, but launching is what brings it to life for others.
Marketing & Promotion
You’ve done the hard work of writing, designing, and printing your book. Now comes the part that often feels scarier than writing itself: telling the world about it.
Many first-time authors hope their book will simply “get discovered.” The truth? Even the most beautiful stories need a little nudge into readers’ hands. Marketing doesn’t have to mean shouting on social media all day. At its heart, it’s about connection, letting people know your story exists and why it matters.
Start Before You Publish
Don’t wait until launch day to start talking about your book. Begin building interest as soon as you can.
- Share your journey online: photos of your drafts, sketches, or even the messy desk where the magic happens.
- Reveal your cover ahead of time, it’s one of the strongest tools for grabbing attention.
- Give sneak peeks of characters or illustrations to make your audience curious.
By the time your book is ready, your readers will already feel invested.
Use Your Own Voice
You don’t need to sound like a salesperson. In fact, people connect more when you share honestly. Talk about why you wrote the book, what inspired the characters, or what you hope children will feel when they read it.
Think of marketing as storytelling, just like your book, it’s about emotion and resonance.
Explore Different Channels
Marketing works best when it fits your personality and lifestyle. Here are some common ways children’s authors spread the word:
- Social Media: Instagram, TikTok, and Facebook groups for parents and teachers are great spaces for kidlit.
- School and Library Visits: Offer readings, Q&A sessions, or workshops. These events build trust and get your book directly in front of kids.
- Local Bookstores: Many independent shops love supporting local authors. Reach out to schedule signings or ask if they’ll carry your book.
- Podcasts and Blogs: Parenting blogs, teacher podcasts, or kidlit review sites are always looking for new voices.
Pick the methods that feel doable and authentic to you.
Set a Budget (and Expectations)
You don’t need to spend thousands, but having a small budget helps. Think about professional ads, printed bookmarks, or promotional giveaways. Even small touches can make your book memorable.
At the same time, stay realistic. Many children’s books don’t make huge profits right away. Your first book is often about learning the ropes, building an audience, and creating a foundation for future titles.
Keep Improving
Marketing doesn’t stop after launch day. Keep talking about your book. Share reader reviews. Post pictures of kids enjoying it. And as you work on your next project, remember that each book teaches you something new.
Just as children’s book editing strengthens your story draft by draft, consistent promotion strengthens your author journey step by step.
Join Author Communities
Publishing can feel lonely. You spend months (sometimes years) shaping a story, and then suddenly you’re supposed to know how to launch, market, and sell it too. The truth is, no one figures all this out alone. That’s where author communities come in.
Why You Need a Writing Community
Being around other writers, especially other children’s book authors, keeps you motivated and informed. They understand the highs and lows of creative work. They’ll celebrate when you finish a draft and sympathize when you’re stuck in edits. More importantly, they’ll share advice that you can’t always find in a blog or YouTube tutorial.
If you’re feeling overwhelmed about how to publish children’s book projects, these communities can help demystify the process. Sometimes, hearing “yes, it’s hard for me too” is exactly the encouragement you need to keep going.
Where to Find Your People
There are countless ways to connect with other writers:
- SCBWI (Society of Children’s Book Writers and Illustrators): The most established global network for kidlit creators. They offer workshops, critique groups, conferences, and awards.
- Online Communities: Facebook groups, Reddit threads, and forums dedicated to kidlit are full of active discussions.
- Local Writing Groups: Check libraries, bookshops, or community centres for meet-ups.
- Workshops and Retreats: In-person or virtual events where you not only learn but also meet others walking the same path.
What You’ll Gain
Joining these networks isn’t just about swapping tips. It’s about building long-term support. You’ll find:
- Critique Partners: Trusted readers who give feedback before you publish.
- Industry Insights: Updates on market trends, publisher calls, and contests.
- Opportunities: From collaborations to school visit invitations.
- Encouragement: The reminder that you’re not alone in the process.
Give as Much as You Take
Author communities work best when you contribute too. Offer feedback on others’ manuscripts, share resources, or simply cheer people on. The goodwill you put out comes back around.
Publishing is a long journey. Having fellow travelers beside you doesn’t just make it easier, it makes it richer.
Measure & Learn
Your book is finally out there. Readers are holding it, parents are reading it aloud at bedtime, and maybe a teacher is sharing it with a class. That’s a huge accomplishment in itself. But your journey as an author doesn’t end on launch day, it’s just the beginning of the learning curve.
Gather Reader Feedback
Pay attention to what readers say. This doesn’t mean obsessing over every Amazon review, but listening for patterns.
- Do kids laugh at the parts you hoped they would?
- Do parents or teachers comment on the message or flow?
- Are there moments where attention drops?
This kind of feedback is gold. It helps you see your book through the eyes of the audience it was made for.
Track Sales and Reach
Numbers don’t tell the whole story, but they’re worth watching. Look at:
- Which platforms sell the most copies (Amazon, local shops, direct sales)
- Which formats perform better (paperback, hardcover, ebook)
- Whether spikes happen after certain promotions or events
These insights guide your strategy for your next launch.
Celebrate the Wins
It’s easy to get caught up comparing yourself to bestselling authors. Don’t. Finishing and publishing your book is already a win. Did you sell your first ten copies? That’s ten families with your story in their homes. Did a child tell you it’s their new favourite? That’s impact that can’t be measured.
Take time to celebrate. You did something most people only dream about.
Apply the Lessons
Every book teaches you something new. Maybe you’ll refine your writing schedule. Maybe you’ll invest in stronger illustrations next time. Maybe you’ll plan marketing earlier.
Use these lessons as building blocks. Each book prepares you for the next. That’s how authors grow; not through perfection, but through persistence.
Keep the Momentum
Don’t disappear after your first book. Stay connected with your readers. Keep engaging with your author community. And most importantly, keep creating. Whether it’s a sequel, a brand-new story, or even branching into another age group, momentum matters.
Publishing a children’s book isn’t just about one title. It’s about building a creative life that stretches beyond a single project. Learn, adapt, and keep moving forward.
If you need help and want to opt for children’s book writing services, get in touch with our professional children’s book ghostwriters for a free consultation.
Frequently Asked Questions
What’s the right word or page count for my target age group of my children’s book?
Ages 0 to 3: Minimal words, mostly pictures.
Ages 3 to 5: Up to 500 words, often rhythmic or rhyming.
Ages 4 to 6: Up to 1,000 words with simple narratives.
Ages 5 to 9: Around 2,500 words with short chapters.
Ages 7 to 9 (Chapter Books): 10,000 to 12,000 words.
Ages 8 to 12 (Middle Grade): 20,000 to 25,000 words.
Should I aim for traditional publishing or self-publish my children’s book?
It depends on your goals. Traditional publishing gives you professional support and broader distribution, but it’s highly competitive and often slow. Self-publishing gives you control and speed, but you’ll need to manage editing, design, and marketing yourself.
How do I find an illustrator for my children’s book?
You can look through online marketplaces like Fiverr, Upwork, or Behance, explore art schools, or join author networks such as SCBWI. Create a vision board with styles you like to guide conversations with potential illustrators. Always sign a contract.
How do I format a children’s book for print?
Choose a standard size (8 x 10 or 8.5 x 8.5 are common). Make sure your illustrations are 300 DPI, add bleed for full-page images, and use a professional layout program like InDesign or Affinity Publisher. Many print-on-demand services also offer free templates.
Is marketing my children’s book really necessary?
Yes. Even if you land a traditional deal, publishers expect you to promote your own book. If you self-publish, marketing is entirely your responsibility. Social media, school visits, and word-of-mouth are powerful tools.
Can children’s books earn significant income?
Sometimes. But most authors earn modestly. Traditional advances are often small, and self-published books take time to build sales. Many authors diversify their income with speaking events, teaching, or writing multiple titles.
Conclusion
So here you are. You started with an idea; a spark of a story, a character, a little piece of magic, and now you’ve walked through the entire journey of bringing it to life. From defining your audience, to planning, writing, editing, illustrating, publishing, and finally sharing it with the world, you’ve seen what it really takes.
It’s not a straight road. Some steps feel exciting, others overwhelming. But if you take them one at a time, you’ll get there. The fact that you’re even asking how to publish children’s book projects shows you care deeply about doing it right. That matters.
Remember this: children don’t care about ISBNs, query letters, or distribution channels. They care about stories that make them laugh, comfort them at night, or help them feel a little braver. That’s what you’re creating.
Your book won’t just sit on a shelf. It will live in small hands, in classrooms, in bedtime rituals. And that’s worth every step. Now go tell your story. The world is waiting.